

Sourdough cinnamon rolls are more than just a pastry to me – they're my absolute favorite recipe and have been with me for many years. I've tried countless variations, with and without yeast, with different fillings and dough preparations, but none have ever come close to this original. The delicate, subtle acidity of the sourdough gives the cinnamon rolls a depth and character that you simply can't achieve with yeast.
Yes, this recipe takes time and a little patience – typical for sourdough. But it's precisely this long fermentation process that makes the dough exceptionally soft, moist, and aromatic, so the cinnamon rolls practically melt in your mouth. For years, I've brought them to work, whether for birthdays or special occasions, and I'm regularly asked for the recipe. Now the time has finally come: I share this very special recipe with you!
Inspiration for these Sourdough Cinnamon Rolls
This recipe is based on Ruth Mar Tam's "Sourdough Cinnamon Rolls" recipe from her cookbook "Baked to Order." She's actually the reason I started cultivating my first sourdough starter and baking with it since 2021! I'd seen a sourdough recipe on her Instagram that looked too good not to try! And of course, I had to get her cookbook, too!
These sourdough cinnamon rolls were the first recipe from her cookbook that I tried, and I instantly fell in love! However, I had to make a few adjustments to adapt the recipe to German type 550 wheat flour. Even though I compensate for the protein content in the flour with extra gluten, German flour unfortunately isn't as absorbent as North American bread or all-purpose flour. So in my recipe, we use more flour and a little extra gluten, and since this results in more dough, we also need more filling. Besides, this recipe is already quite rich, and the classic cream cheese frosting is a bit too much for me… That's why I prefer to make my sourdough cinnamon rolls with a simple lemon glaze.
Advertisement (Affiliate): If you'd like to try Ruth Mar Tam's original recipe, you can find it here in her cookbook Baked to Order. More of her recipes can be found on her recipe blog cooktildelicious.com , or on her Substack.
Discover More Sourdough Recipes
It's more digestible, healthier, and tastes even better: sourdough as a leavening agent! My sourdough journey began in 2021, the second year of the pandemic. But if I had known beforehand how much fun baking with sourdough would be and what flavor notes you can conjure up in your baked goods, I certainly would have started much sooner!
Would you like to try more of my sourdough recipes? Then take a look in my category sourdough here on “sizzling & frizzling”!
There you will find, for example, the following recipes:
- 100 % Wholewheat Sourdough Bread: Minimal effort, countless variations, fantastic results! Try my recipe for a 100 % whole wheat sourdough bread and be amazed! It's very light and fluffy for a pure whole grain bread and offers almost endless variations! Easily create your favorite bread and enjoy your homemade, fresh sourdough bread with all the health benefits that come with long fermentation and sourdough as a leavening agent.
- Sourdough Pizza (Neapolitan Style): Authentic Neapolitan pizza – enhanced with sourdough as a leavening agent! With my sourdough pizza recipe, you can enjoy this Italian classic at home and relax.
- Fluffy 100 % Wholewheat Seeded Burger Buns with Sourdough: Moist and soft burger buns made from 100% whole wheat flour, refined with sunflower seeds, sesame seeds, poppy seeds, and flax seeds. The use of sourdough and a long fermentation process give them an intense aroma and make them exceptionally digestible. Ideal for hearty burgers where flavor and firmness are key.
Long Fermentation – THE Advantage of Baking with Sourdough!
Compared to recipes using yeast, sourdough recipes often require significantly more time. Extending the fermentation process makes the dough more aromatic, and the fermentation during rising also makes the baked goods more digestible. Another advantage is that baking with a longer resting time results in baked goods that stay fresh and moist longer, meaning they don't dry out as quickly.
Ceylon Cinnamon or Cassia Cinnamon?
Did you know that there are two different types of cinnamon? There's a distinction between the "original" Ceylon cinnamon and the "Chinese cinnamon" Cassia cinnamon.
Ceylon cinnamon is also known as the "real" or "original" cinnamon and comes from Sri Lanka or southern India. Ceylon cinnamon tastes a little more refined, more aromatic and less spicy because it contains less cinnamaldehyde than cassia cinnamon. Cinnamon is also said to have many health benefits that apply almost exclusively to Ceylon cinnamon. Ceylon cinnamon is rich in antioxidants and thus has an anti-inflammatory effect. There are studies that show that Ceylon cinnamon reduces "bad cholesterol" and increases "good" cholesterol and can therefore improve blood values. Ceylon cinnamon also has a blood sugar stabilizing effect and type 2 diabetics in particular can reduce their blood sugar levels with 0.5 - 2 teaspoons of Ceylon cinnamon a day.
Cassis cinnamon, on the other hand, is much cheaper and is usually used in processed foods. You will also often come across cassis cinnamon on the spice shelf in the supermarket. Cassis cinnamon is produced in southern China and contains a much higher concentration of coumarin. An overdose of coumarin can lead to headaches, nausea and dizziness. Just one teaspoon of cassis cinnamon often reaches the recommended maximum coumarin limit, so cinnamon lovers should be particularly careful about which cinnamon they choose.
Advertisement (Affiliate): For these reasons I prefer to use this Ceylon cinnamon to reap the health benefits and enjoy the aromatic, “real” cinnamon taste.
Baking Schedule
In terms of timing, I prefer to follow the following baking schedule for this recipe:
Day 1:
- midday: feeding the starter
- evening: prepare the levain and let it rise overnight.
Day 2:
- morning: prepare the main dough, let it knead & bulk ferment
- midday: place the dough in the refrigerator to cold-ferment
- evening: either shape the sourdough cinnamon rolls on the same evening, or wait another day.
Day 3 – Baking day:
- morning: preheat your oven and bake sourdough cinnamon rolls, alternatively:
- evening: shape sourdough cinnamon rolls
Or Day 4 – Baking day:
- morning: preheat your oven and bake sourdough cinnamon rolls.
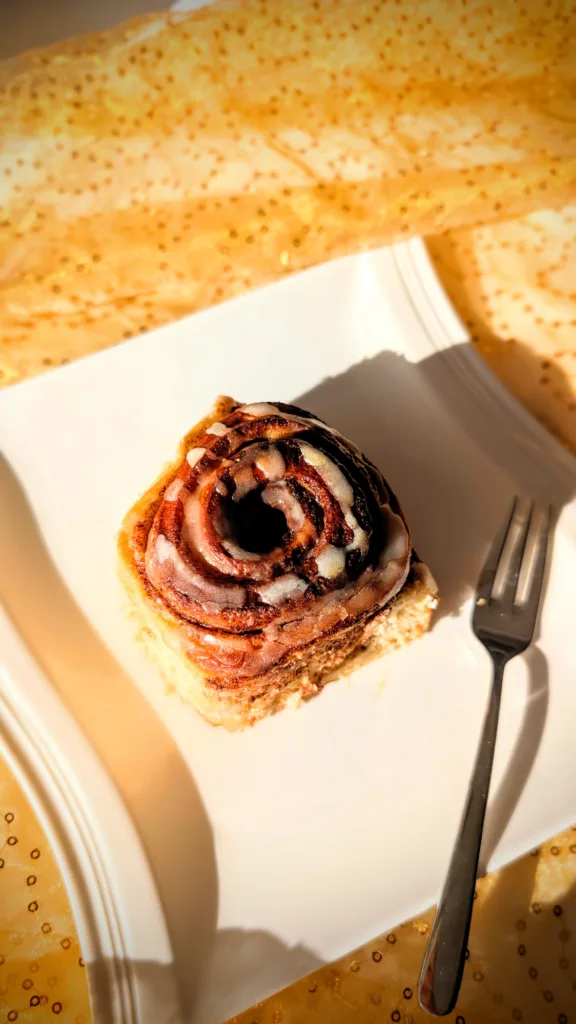
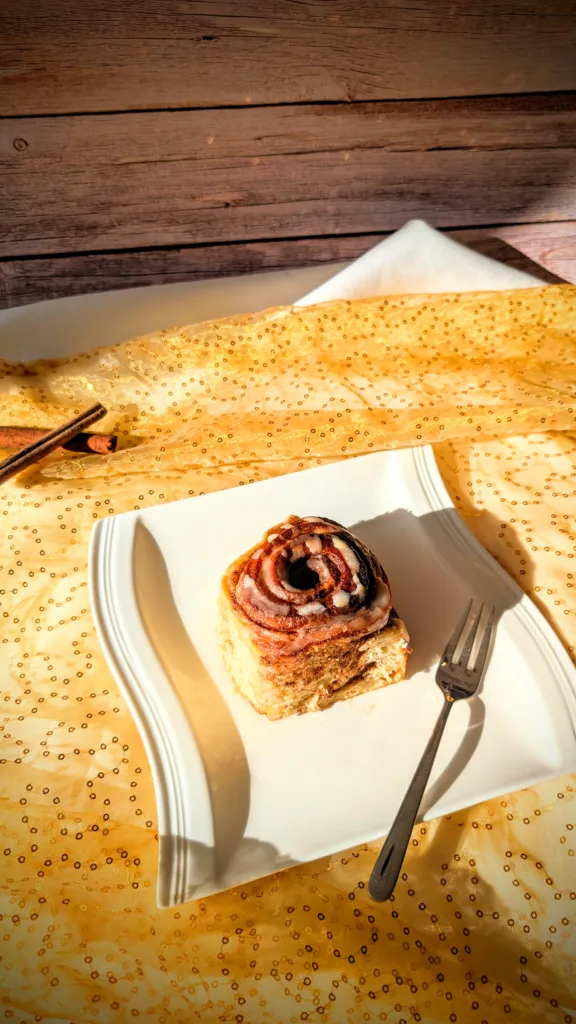
Unparalleled Sourdough Cinnamon Rolls
These sourdough cinnamon rolls are distinguished by their exceptionally soft, tender crumb and a delicate, balanced tang, which comes exclusively from the sourdough. The long fermentation process results in a complex aroma and extraordinary moistness that cannot be achieved with yeast. A recipe for everyone who appreciates cinnamon rolls of the highest quality and wants to invest some time in true craftsmanship.


Ingredients:
For the Levain:
For the Main Dough:
For the Filling:
For the Icing:
Instructions:
Make the Levain:
-
Mix and knead all the ingredients of the sourdough starter into a firm dough. Cover it and let it rise at warm room temperature, at around 75°F (24 °C), overnight or for 8-12 hours.
Note: Your starter should be ripe and active, meaning you fed it just a few hours ago and it has reached its peak.
Prepare the Main Dough:
-
Place both types of flour, gluten, sugar, and milk powder into the bowl of your stand mixer and mix the ingredients well. Then, pour the liquid ingredients—the egg, milk, cream, and all of the levain—into a well in the center.
-
Now, let your stand mixer knead the ingredients into a dough on the lowest setting using the dough hook attachment.
Autolyze:
-
Turn off the stand mixer and cover it with a tea towel for 45 minutes.
Knead the Main Dough:
-
Now add the salt to the main dough and knead it in briefly on the lowest speed for about 5 minutes. Then add about half of the softened butter and knead it in well. Repeat with the remaining butter.
-
Next increase the speed of your stand mixer and let it knead the dough thoroughly for about 15-20 minutes, until it passes the windowpane test (see video).
Note that you shouldn't add any more flour. The dough is quite sticky and therefore difficult to knead by hand. If you don't have a stand mixer, it's best to use a handheld mixer with dough hooks attached.
Bulk Fermentation:
-
Remove the mixing bowl from the stand mixer and cover it well (e.g., with a shower cap or cling film). Let the dough rise for 2 hours at a warmer room temperature (approx. 75 °F / 24 °C). The dough will rise noticeably during this time, but will not double in size. Stretch and fold the dough (see video) and then refrigerate it for 8–24 hours.
Sometimes I let the dough rise in the refrigerator for more than 24 hours because it fit better into my schedule. That worked perfectly fine for me, too.
Prepare the Filling:
-
Place all the ingredients for the filling in a bowl and mix them together to combine.
Shape Cinnamon Rolls:
-
Take the dough out of the refrigerator and place it on your lightly floured work surface. Roll it out into a rectangle, with the shorter side being approximately 14 inches (36 cm) long.
-
Now place all of the filling on the dough and spread it evenly. Spread the filling all the way to the edges.
-
Next roll the dough into a log (like a jellyroll) starting from one of the shorter sides. Position it seamside down.
-
Prepare your baking tin by lining the bottom of a 10-inch (26 cm) springform with parchment paper and greasing the rim with butter or coconut oil.
-
Then use a thread to divide the dough roll into 9 evenly wide cinnamon rolls. Distribute them evenly in the springform, making sure that the cut side of the edge pieces is facing up.
Please use a thread to cut the cinnamon rolls, not a knife! A knife will always flatten the cinnamon rolls a bit, while a thread helps them retain their round shape.
Final Proofing:
-
Let the cinnamon rolls rise again at a warmer room temperature (at around 75 °C / 24°C) for approximately 8 hours or overnight. They should have risen considerably during this time and now fill the entire baking pan.
Baking Cinnamon Rolls:
-
45 minutes before the cinnamon rolls are finished rising, preheat your oven to 400 °F (200 °C), top / bottom heat.
-
Then place the cinnamon rolls in the oven to bake for 20-25 minutes on the second-to-last rack, i.e., one rack below the middle one (in the lower third of the oven).
-
When the cinnamon rolls are golden brown and have reached an internal temperature of 196 - 200 °F (91 - 93 °C), remove them from the oven and immediately remove the rim of the springform.
It's important to remove the sourdough cinnamon rolls from the springform immediately, as the butter and sugar will have formed a cinnamony caramel during baking. Straight from the oven, the caramel is still liquid and the pan will release easily. However, if you let it cool for even just 5 minutes, the caramel will harden and stick to the springform.
Lemon Glaze Finish:
-
Finally, mix the powdered sugar with the lemon juice to make a lemon glaze and spread it evenly over the cinnamon rolls. Enjoy them best while still warm and in good company!
Nutritional Information
servings 9
- Amount per Serving
- Calories 271.44kcal
- % Daily Value *
- Total Fat 13.99g22%
- Potassium 27.41mg1%
- Total Carbohydrate 31.86g11%
- Dietary Fiber 0.38g2%
- Sugars 29.17g
- Protein 4.22g9%
** The daily percentages are based on a 2000 kcal diet. Your daily figures might be higher or lower according to your caloric need.
Remark
Tip:To achieve a warmer room temperature, you can place the levain, dough, or cinnamon rolls in the oven with the light on and the oven door slightly ajar. Alternatively, a proofing box is recommended, where you can set the temperature precisely.
Tip:These sourdough cinnamon rolls can be frozen and enjoyed at a later time.
Advertisement (Affiliate): If you'd like to use the same proofing box as me, you can find it here: proofing box from Brod & Taylor. Since I got it, baking has definitely become much easier for me, as I can control the temperatures much better. Especially when baking with sourdough, I find it very important to be able to control the temperature down to the degree, and thus better plan and estimate the proofing times.